Is your latop’s Bluetooth not working, not found on Windows 11 laptop setting? Here is a list of the most effective methods that fix connection to Bluetooth audio devices and wireless displays in Windows 11. Fix Connections To Bluetooth Audio Devices And Wireless Displays In Windows 11 even if you are not from any technical background. Sometimes it can happen that your Bluetooth paired but not connected to your audio devices or wireless displays.
The wireless technology in Windows 11 has been there for many years and got improved on every new update. You can play music through Bluetooth speakers from computer or Windows 11 mobile etc.
With Bluetooth, you can connect to the Wireless Optical Mouse, Wireless Keyboards(Gaming Keyboards), Wireless Headphones and many other wireless devices which work over a Bluetooth connection.
But, while using them with your computer or phone, you may face little problems sometimes. That’s why we are here to give you the exact steps to Fix Connections to Bluetooth Audio Devices and Wireless Displays in Windows 11 mobile. The Microsoft wireless display adapter in device manager Windows 11 gives you the capability to connect your wireless displays.
In case you have any issue with the display adapter you can go with Microsoft wireless display adapter troubleshooting.
Bluetooth driver for Windows 11 helps to connect the Bluetooth enabled devices such as Bluetooth headset, Bluetooth speakers etc.
Why is Bluetooth not finding devices?
There can be many reasons why Bluetooth is malfunctioning. It could be a problem with the software or the hardware. Whatever the case, it can very well be remedied easily. Here are some common problems:
- Driver malfunction
- Problem with bluetooth hardware
- Problems with connected devices
- Remotely connected device
- Problems with a specific software
- Laptop computer or device that does not support Bluetooth
1. Check if the PC supports Bluetooth
First and foremost, you should check if the PC supports Bluetooth. You can check if your PC supports Bluetooth both from ‘Network Connections’ and ‘Device Manager’. We will go with the second option as it gives more reliable results.
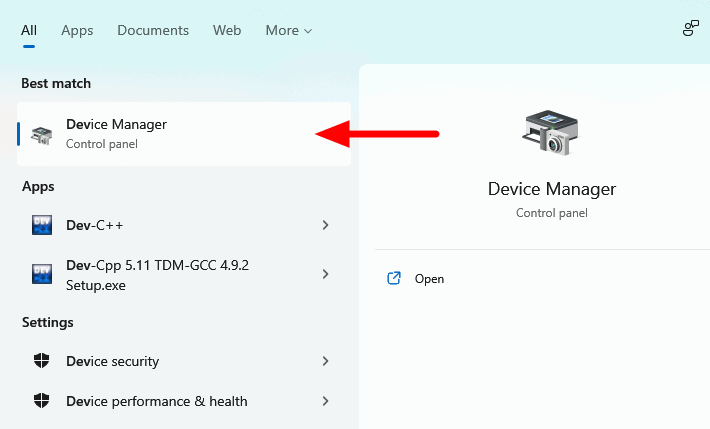
To check if your system supports Bluetooth, search for ‘Device Manager’ in the ‘Search’ menu and click on the relevant search result to launch the app.
In Device Manager, find the ‘Bluetooth’ and click the downward arrow icon in front of it to expand and view the devices. If you find the devices listed here, your computer most likely supports Bluetooth.
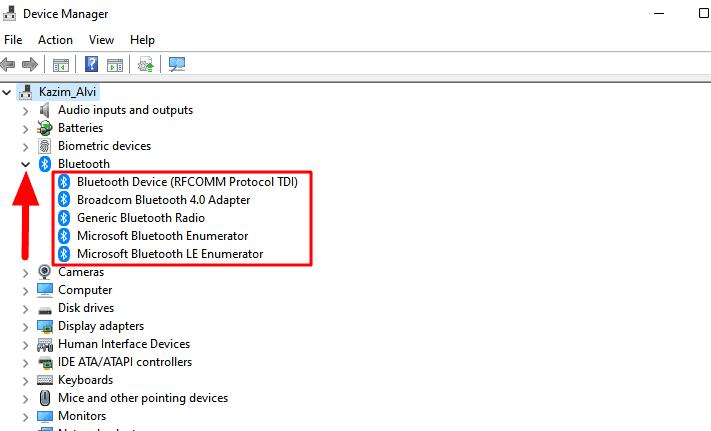
To confirm the same, check if there is a ‘Bluetooth’ device listed under ‘Network adapter’. If yes, your PC supports Bluetooth and you can move on to other fixes mentioned in the article.
What if there is no Bluetooth in Device Manager? If you do not find Bluetooth devices listed in ‘Device Manager’, your system does not support Bluetooth. In this case, you can use an external USB Bluetooth Adapter or a PCI card. Many users with older laptops and PCs often use these to add Bluetooth support.
2. Check if Bluetooth is enabled
We usually assume that Bluetooth is enabled, which is sadly not always the case. Therefore, you should first check if Bluetooth is indeed enabled on both your PC and the Bluetooth device you are connecting to and is set to ‘Paired’ mode.
Additionally, some laptops come with a physical key to activate Bluetooth. If your laptop has one, find it and verify it’s turned on. You can check your laptop’s manual to determine the location of the physical key, in case one is present.
Also, remember to turn Bluetooth back on, as it can also fix various basic problems that keep it from working.
3. Troubleshoot Bluetooth
Windows 11, like previous versions, comes with a built-in troubleshooter to help troubleshoot various minor and complex problems. Whenever you get an error, it’s best to run the test first and let Windows fix it, rather than meddle with the settings.
To run the Bluetooth debugger, click the ‘Start’ icon on the Taskbar or press WINDOWS+ X to launch the Quick Access menu and select ‘Settings’. Alternatively, you can press WINDOWS+ I to launch the Settings app.
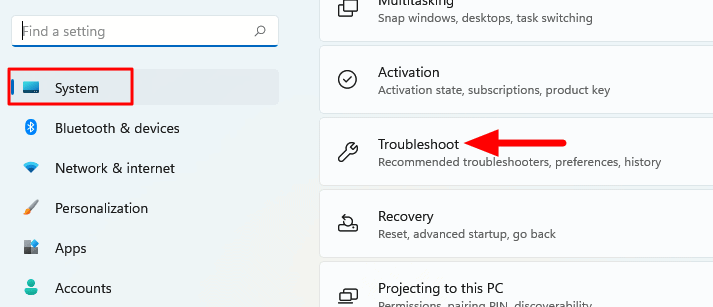
Then “Other troubleshooters”, and click Run next to Bluetooth. Follow the on-screen instructions and select the relevant options to complete the debugging process.
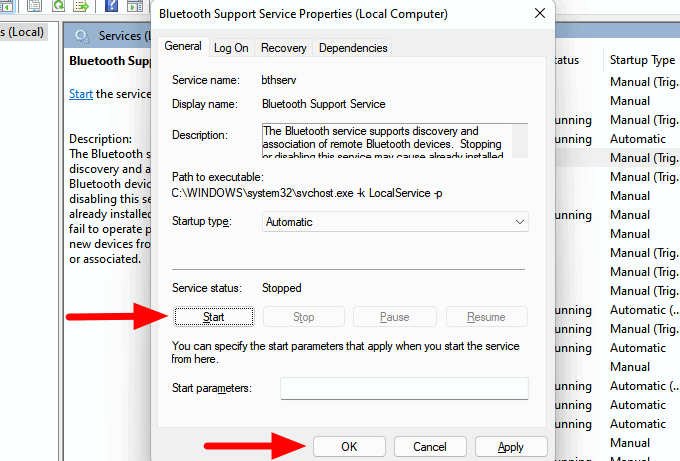
4. Restart Bluetooth Services
If the Bluetooth Support Service is not running, start it or if it crashes, restarting it should fix the problem. To start/restart Bluetooth Assistive Services, press WINDOWS+ S to launch the ‘Search’ menu, type ‘Services’ in the text field at the top, and click on the relevant search result to launch it. run the application.
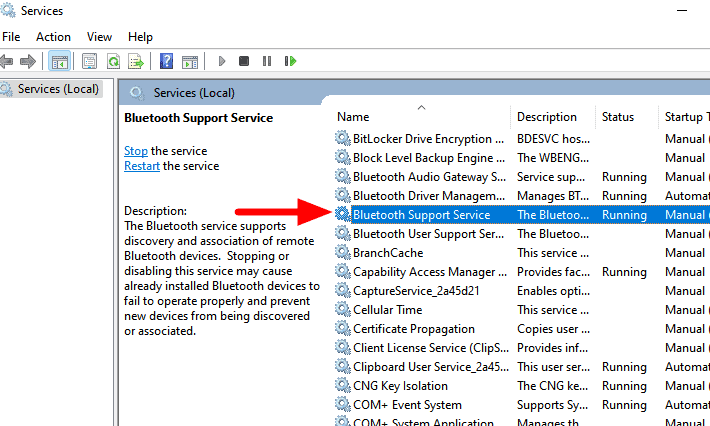
Check “Startup types” then choose “Automatic”. Finally “Start” in “Service status” and “OK”.
Fix Connections To Bluetooth Audio Devices And Wireless Displays In Windows 11
Windows 11 Bluetooth Audio Devices:
After pressing the Connect button in Action Center, if you do not see your device in discovered devices list, you can try the below steps:
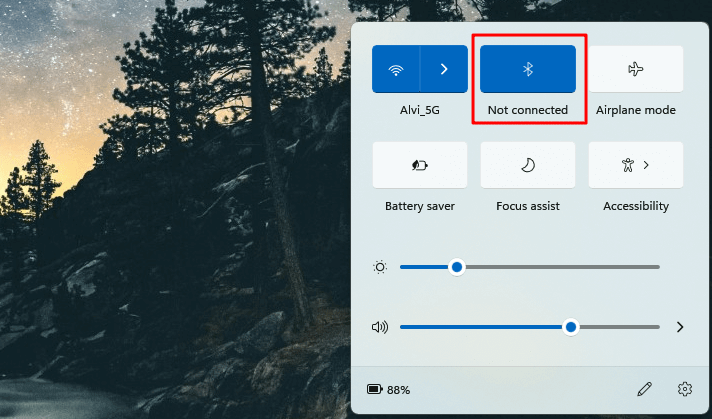
- Make sure that your Windows device supports Bluetooth functionality and that it’s turned On in your device. You’ll see a Bluetooth button in Action Centre when you open it.
- If you don’t see the Bluetooth button in Action Center, try updating your device’s driver to the latest version. Here’s how you can update your device driver: go to Start >> enter Device Manager >> select it from the list of results, and then, in Device Manager, find your device, right-click on it(or press and hold) , select Update Driver Software, select Search automatically for updated driver software in the list, and then follow the rest of the steps.
- If Bluetooth is turned On, and the driver is up to date, but your Bluetooth audio device still doesn’t work, try removing the device and re-pairing it. Here’s how you can do it: go to Start >> enter Devices >> select Bluetooth >> select the device >> select Remove device >> and then try pairing again.
- Also, make sure that the Bluetooth-enabled audio device is switched On and Discoverable. How you do this differs with devices, so check the device manual that came with your device or directly go to the Manufacturer’s website.
Using WiGig Devices With Windows 11:
If pressing the Connect button in Action Centre doesn’t find your wireless device, try the following steps:
- Make sure that your Windows device supports WiGig and is turned On and Discoverable. If your PC supports WiGig, you’ll see a WiGig button in Settings >> Flight mode.
- Make sure that the display supports WiGig. If it doesn’t, you’ll need a WiGig dock.
Using Miracast Devices With Windows 11:
If pressing the Connect button in Action Centre and after searching for wireless display and audio devices if you don’t find your device, give the following steps a try:
- Just double check that your Windows device supports Miracast by checking the device manual that came with it in the box or by going to the manufacturer’s website.
- If you see any messages like “this device doesn’t support miracast” or “your pc or mobile device doesn’t support miracast” then contact miracast support.
- Make sure that WiFi is turned On on the device.
- Ensure that the display you want to forecast to supports Miracast and that it’s turned On.
- If it doesn’t, you’ll need a Miracast adapter (also called a “dongle”) that plugs into an HDMI port on your display device.